Home › Forums › Explore Media › Photography › Cross Polarization Photography
- This topic has 4 replies, 2 voices, and was last updated 2 years, 4 months ago by
 WFMartin.
-
AuthorPosts
-
April 15, 2020 at 11:41 am #486725
I want to digitally reproduce some very dark, very glossy, very textured canvases. Scanning didn’t work so well. I’m assuming there’s no way to use cross-polarization techniques to improve scan quality – say, by just putting a filter over the scanning bad?
Failing that, I’m curious what is recommended for Cross-Polarization equipment. I currently have a Cannon Rebel T6i, a tripod, and 1 lense (Canon EF-S 18-55mm f/3.5-5.6 IS II Lens)
Lake, of lakedoesart.com (NSFW)
April 16, 2020 at 6:38 am #975621There are several written articles on Google on this subject.
From what I can gather you may need a flash with the camera and a polarising filter on both the camera and the flash to get a reasonable result for dark subjectsCherish yesterday,dream tomorrow,live today
April 19, 2020 at 6:00 am #975622Anonymous
I have done plenty of Cross polarization captures from oil paintings. One polarizer goes on your lens, and on each off camera flash unit. Both flash units must have polarizers set at the same orientation for this to work.
You will need to experiment and it is a good idea to profile the capture with the polarizer filters set the same for both the profile image and the painting image. Profiling is required because Cross Polarization ramps up contrast and usually imparts a colour cast.
Sometimes the camera polarizer is backed off [rotated] a touch to bring back some edge sheen or else the image of the painting can go dead. The colour may show well but the image of the paint may lack lustre. I have done exactly that with this example. This is made slightly more complicated because I combined 2 images of the painting in PS [Photoshop]. I changed the lighting for each capture. This is because there are both horizontal and vertical paint strokes in the painting made with brush and paint knife that I wanted to showcase.
Painting scanned on a flatbed scanner – no polarizers were employed Note: The light in a flatbed scanner is position wrong for dark shiny paintings.
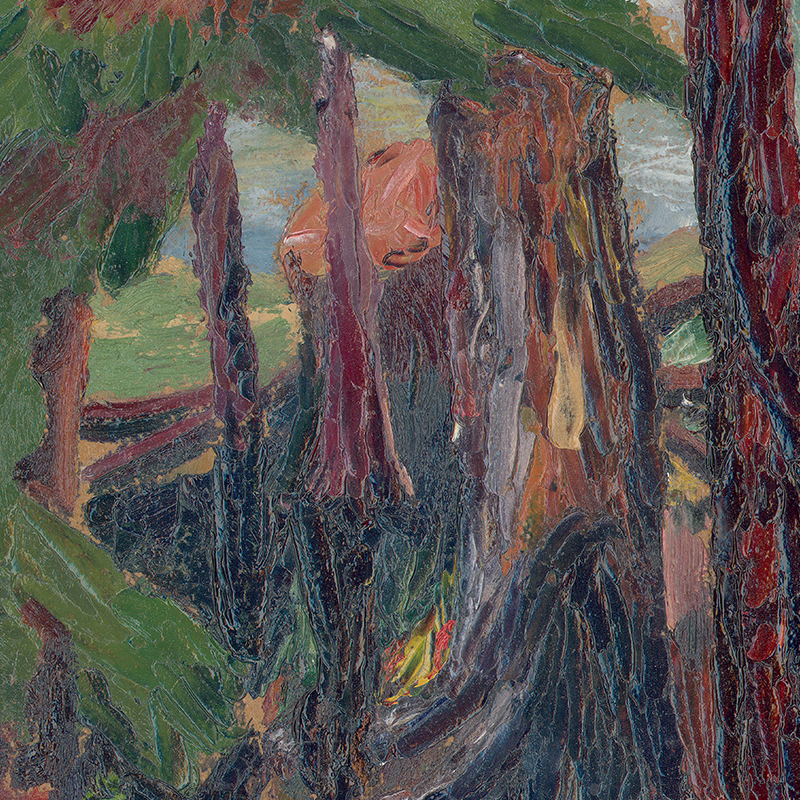
Painting captured with a camera setup – polarizers were used on the lens and both lights
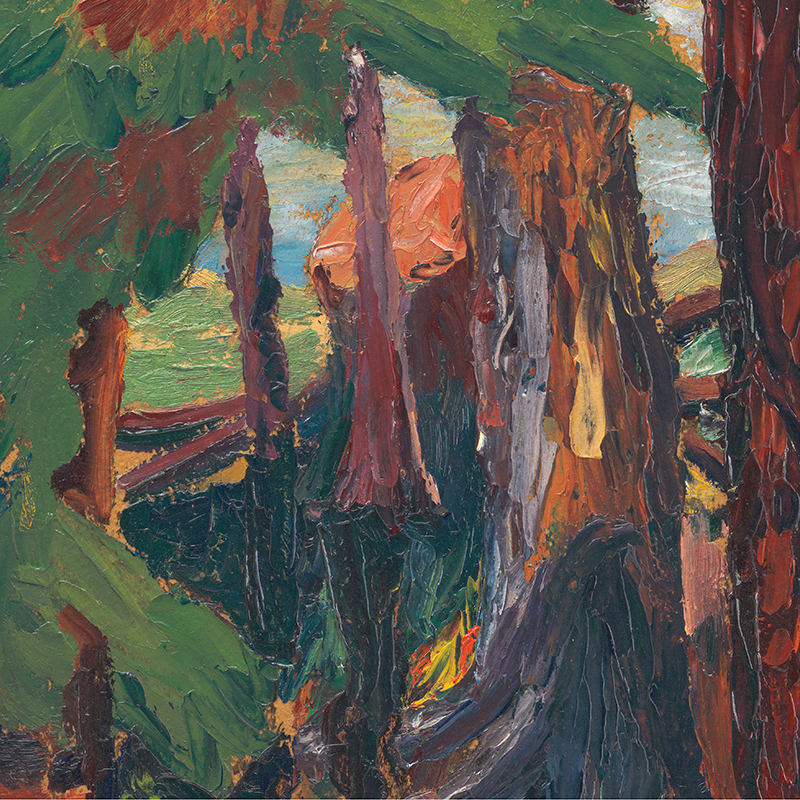
painting detail. Oil on board “When Sun Peeps Through” Faye Popoff 1949
June 26, 2020 at 11:29 am #1303635A simple technique that I have used often is to take a photo of the painting at an angle that eliminates any glare then use EDIT > TRANSFORM > DISTORT in Photoshop to bring all of the edges back to horizontal and vertical. Other editing software have similar tools to DISTORT in Photoshop.
https://PaintingsByTom.etsy.com
https://GeeksBearingGiftsTNA.etsy.comDecember 26, 2023 at 10:40 pm #1536239My background is in the litho trade, where I used to work on very large, copy cameras.
I also considered myself an amateur photographer, of sorts.
At the moment, I am an oil painter, and I’ve successfully photographed my own oil paintings for as long as I’ve been creating oil paintings.
While most photographers enjoy experimenting with comparatively expensive equipment, such as is being suggested here……namely polarizing filters, and the like, I’m going to suggest a simple operation for photographing art work, either matte, or glossy, either textured, or not.
If there is any “secret” to my method at all, it is represented in the lighting.
And, the true secret to photographing otherwise troublesome oil paintings, is that there should be absolutely no direct light illuminating the subject. The sun is direct light, the sky is direct light, a flashlamp is brutal, direct light, a skylight, or table lamp is direct light, a reflection from your own clothing is direct light, as far as your art is concerned, at the moment of exposure.
This is exactly the steps I take to photograph my art. Now, I’ll admit to this one caveat….If you are photographing huge, 30″ x 40″ artworks, this may not be feasible, from a purely mechanical/physical standpoint. (You may have difficulty positioning your camera far enough away from the art.). I sometimes climb up a stepladder if my art size demands it.
I find an area such as a gazebo, a park ramada, the covered patio of your back door, etc., etc. Some place that is normally filled with ambient light, but none of it being direct light.
I place my art on the floor of such a space, face up.
I take my camera, turn the flash off, stand above my art in the dead center of it, sometimes positioning it between my outstretched legs. I position my camera to center the art within the window. take a deep breath, let about half of the air out, hold that position, and snap the picture.
Realize that ANYTHING that reflects off of you, or your camera, is to be considered “direct light”, as far as the painting is concerned. So, take off your glasses, if you wear them, wear a black T-shirt for clothing, and eliminate anything that could possibly reflect onto the painting.
This indirect lighting approach has been very useful, and successful for me for the 30+ years I’ve been painting, and photographing my work. When photographing art, there is a LOT to be said for the “indirect lighting” concept! When I was a lithographic cameraman, we were obliged to use 45 degree lighting, using Pulsed Xenon lamps located at either side of our copyboard. One reason for this was the extreme slow film speed of our lithographic film. We were always wishing that we could somehow use this indirect lighting for troublesome pieces of art, but the length of our exposures would have been ridiculously long–prohibitively so.
But, this concept works like a charm for photographing art, glare-free. I use my modestly-priced digital camera for this purpose. When the art is small enough, I actually use my cell phone, and it, too, functions well for this indirect lighting approach. I use no expensive photographic accessories. Just an inexpensive camera, and……indirect lighting!


Each of these is 16″ x 20″ in their dimensions. Oil on canvas. Gloss Varnished.
wfmartin. My Blog "Creative Realism"...
https://williamfmartin.blogspot.com -
AuthorPosts
- You must be logged in to reply to this topic.
Register For This Site
A password will be e-mailed to you.
Search