Home › Forums › Explore Media › Oil Painting › Painting a pear – Step by step tutorial
- This topic has 14 replies, 11 voices, and was last updated 12 years ago by
 reikiart.
-
AuthorPosts
-
April 8, 2012 at 5:53 am #989552
Some time ago I wrote an article for a dutch magazine (Palet). A few people asked for a translation, so I made an english version. I thought it would be a nice idea to post it here…
Alla prima painting in ‘Stand Oil Technique’
Introduction
In the past two years, I painted a large number of small paintings to improve my alla prima technique. Often, I let the webcam look over my shoulder to capture the process in a movie. In this article I’ll explain step by step what I do during a session using images from a movie.
Materials
This study I paint on grey cardboard, sized with some acrylic varnish. This support has properties that sit somewhere between canvas and wood panel. Just before I start painting, I oil out the support with a medium consisting of equal parts Liquin and stand oil. This is the core of the ‘state oil’ technique (my word.) Because of this wet couch of oil, the paint retains the same consistency during whole session. In combination with the fine-grained structure of the cardboard, it also facilitates softening or removing visible touches.
My color palette consists of a fixed number of pigments that cover the entire color circle. It more or less contains a warm and cool variant of all the primary colors and green, and of course, titanium white. The colors are arranged in spectral order. The palette is made from glass which is easily cleaned with methylated spirits. Pigment list (all from Scheveningen/Old Holland: titanium white, Scheveningen-lemon yellow, cadmium yellow deep, Sch-red medium, alizarine permanent, dioxazine purple, ultramarine deep, transparent oxide red, Sch-green, sap green, paynes grey.

In alla prima painting, skillful manipulation of the wet paint is very important. My experience is: the fewer coats of paint you want, the more different types of brushes you need. For the lay-in I use bristle brushes and for thin lines and details I use a sable liner brush. I also use a number of ‘house painter’s brushes’. These are a little softer than bristle and are well suited for softening / smudging paint touches.
Preparations
When painting I like to keep things as simple as possible. I therefore put the subject as close to the painting as possible. Both should be visible at a glance. Also, I depict the subject as big as I see it in real life. This is also called the ‘sight-size method.

Before I start to paint I mix a few colors I see in the subject. You can’t mix the colors exactly, but it’s handy to have a few piles of paint on your palette that are approximately right. To see if the color mixture is about right, I hold the palette knife in the line of sight between my eye and the subject.

Lay-in
To define the composition, I first make a sketch in transparent oxide red and ultramarine blue. Because the support has a couch of medium, I can easily wipe off paint or move it with my thumb to make corrections.

I paint from coarse to fine. In the beginning, I look through my eyelashes so I don’t see details, and paint only the large planes of color and tone I see in the subject. I start with the side of the table, the background and the tabletop. The medium is a bit too stiff to fill large areas quickly, so I dilute it with some turpentine here. I smudge the excessive visible touches with a large empty brush.


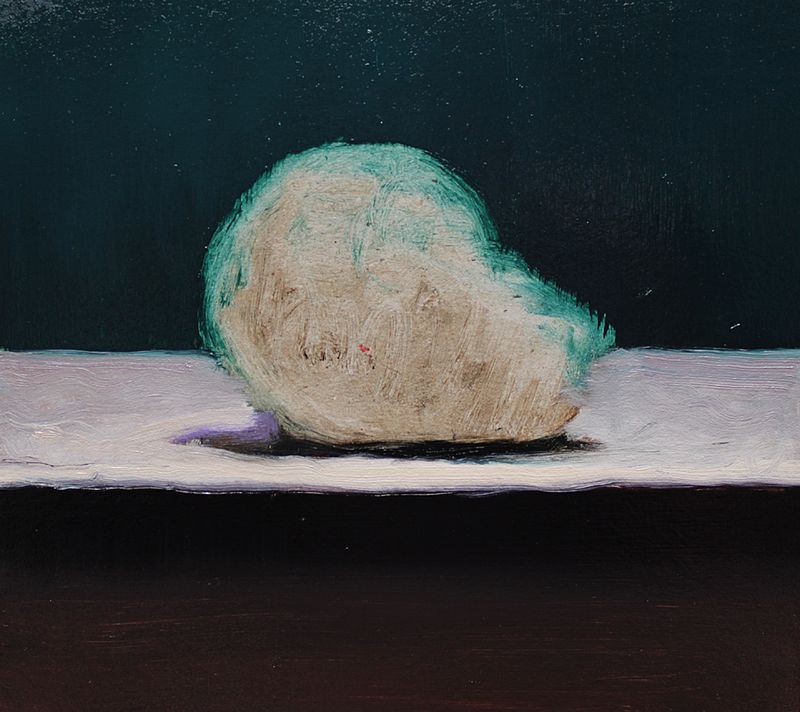
Now the pear. I first fill up the remaining void using the mixtures that I prepared. Now the entire suface is covered, I can compare the painting with the subject and adjust where necessary. With each new touch of paint, I ask myself: is it too light, too dark, does it have to be greener or does the color tend to yellow more, is the color more saturated or more gray? If the subtle shifts in color and tone are faithfully reproduced, you get a convincing illusion of light and plasticity.
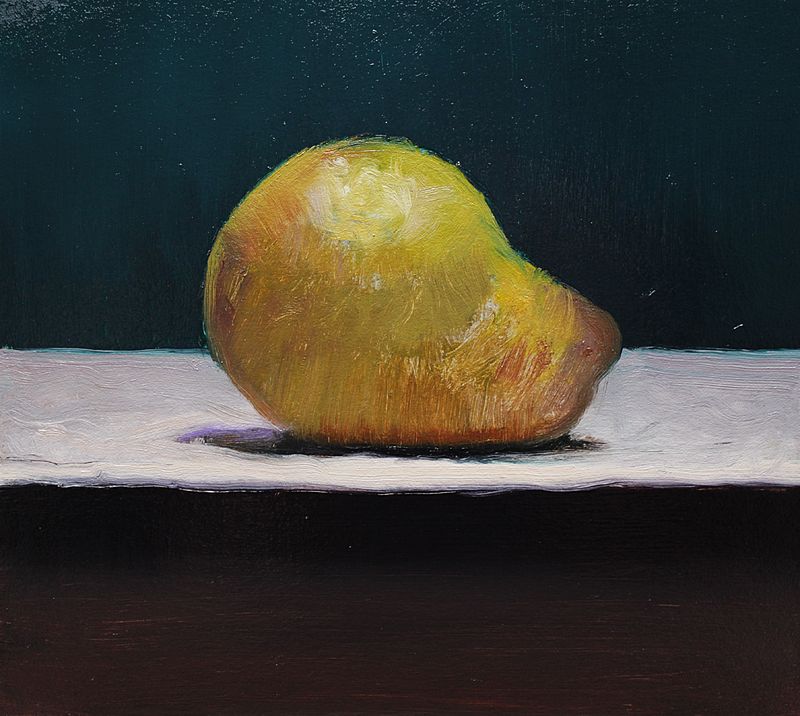
Further elaboration
At some point in this process, you notice that the painting doesn’t change a lot anymore. This means the lay-in is ready. Now I first remove the visible touches here and there, for example at the edge of the pear. There are not many visible details there, because the surface of the pear is receding towards the background. To remove the touches, I wipe through the paint with a large empty brush. I make strokes beginning in the background, right over the edge, into the area of the pear. The stand oil medium is particularly suitable for this kind of operation. I also soften the inner area of the pear where needed, using a large brush.
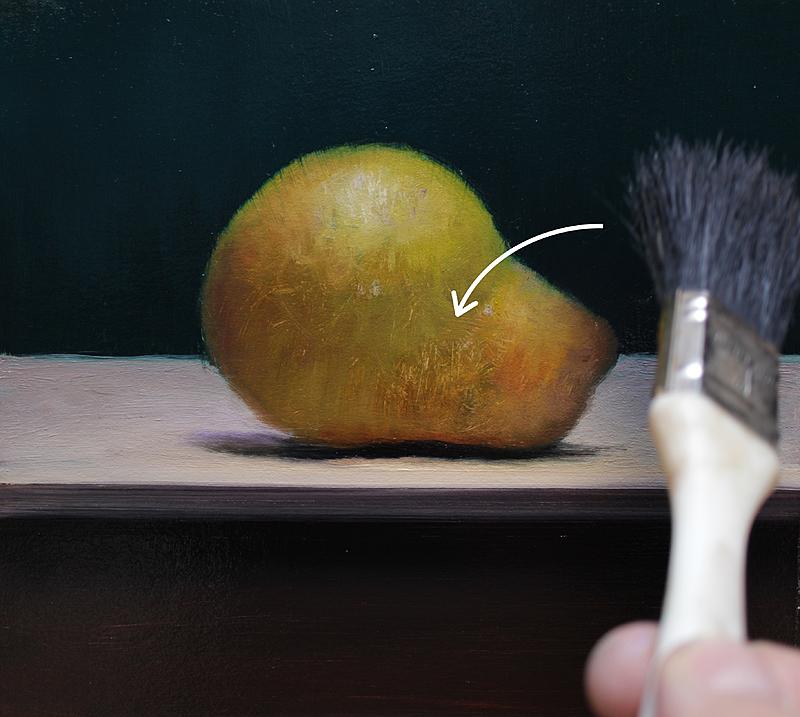
Now the unwanted touches have been removed, it immediately strikes me that the pear is still looking too flat. To strengthen the impression of tangible form, I add some reflected light at the bottom, by carefully tapping on the paint. I also darken the core shadow in the center of the pear somewhat. Note that at this stage, I’m not matching tones and colors from the subject anymore, but I try to recognize plastic shape in the painting itself. On the basis of that, I decide how an area has to be modified.

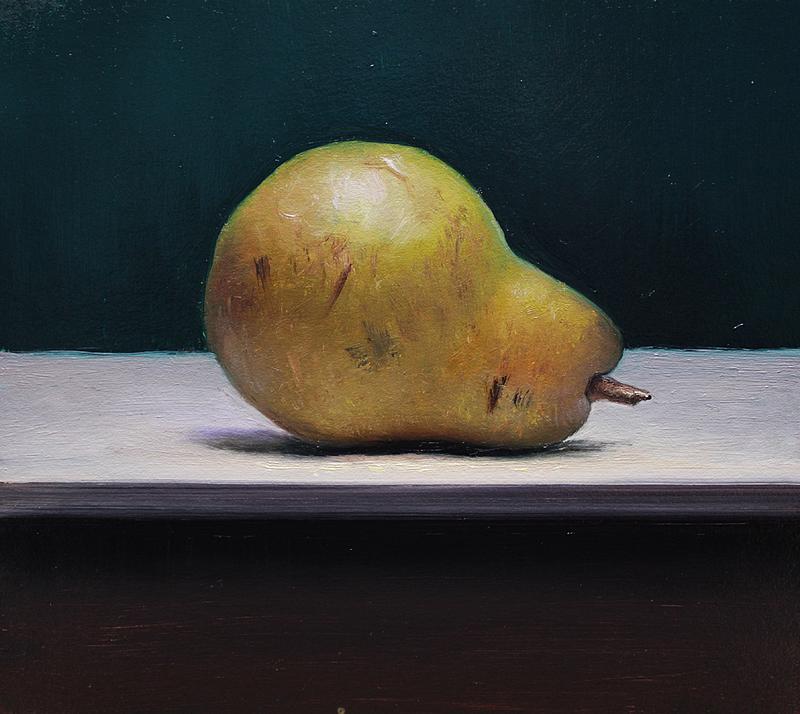
Finish
Now the large volume has been established, I can add details. Usually I don’t copy details literally from the subject, but I try to suggest them using a large brush. At this stage, I also finish up the edge of the pear. Where I want the edge to be sharp, I pull along it with a liner brush, through the background. By varying the sharpness of the edge one can suggest some plasticity of form and depth. And finally: the stem….
 April 8, 2012 at 6:07 am #1159582
Thank you for taking the time and energy, to show how to paint with the method used. And of course, for one juicy all prima pear.
April 8, 2012 at 7:23 am #1159587squueee great post. Might i ask the colour in the background?
I hadn’t seen this one before.
Thanks for posting
Sarah
April 8, 2012 at 8:59 am #1159586Love this!
blah
April 8, 2012 at 9:20 am #1159585Most generous of you, Jos. Thanks!
Judging a Manet from the point of view of Bouguereau, the Manet has not been finished. Judging a Bouguereau from the point of view of Manet, the Bouguereau has not been begun.
--Robert Henri, The Art SpiritApril 8, 2012 at 10:57 am #1159589Really great tutorial. Thanks.
I’m having fun with painting in oils but actually working with the medium is proving to be difficult for me to grasp. This is really useful. I’m going to do something similar soon I think. Thanks.
April 8, 2012 at 11:19 am #1159579greeeen

but i’m not shure what colors were in there, I think
just my standard colors plus old holland
scheveningen blue (strong phtalo blue)………Jos
squueee great post. Might i ask the colour in the background?
I hadn’t seen this one before.
Thanks for posting
Sarah
April 8, 2012 at 1:21 pm #1159583Great colors – I particularly like some of the brushwork on that first full-color statement of the pear.
My website: http://www.rusticportraits.com
My artwork blog: http://llawrencebispo.wordpress.com
My art materials blog: http://sunsikell.wordpress.comApril 8, 2012 at 5:56 pm #1159588Lol, thanks Jos, looks like i will just have to play a bit with my paints.
Have a great day, once again i’ve just come off night duty and am about to go to bed. (It’s 8:00am here)
Night all
April 8, 2012 at 9:27 pm #1159578April 9, 2012 at 12:56 am #1159584Thanks from me too. I’ll be sure to bookmark it when I get the courage up to take a break from my slow-and-steady layered technique and venture out into alla prima.
April 9, 2012 at 2:49 am #1159591Thanks I will have to do this when I get my paint. Question about acrylic varnish though. So I can buy that then paint it on cardboard instead of using canvas? Would save me a lot of money while I practice.
April 9, 2012 at 6:27 am #1159580Yes, I also use this for study all the time. Cheap, and one can cut it to any size using a sharp knife. Lately, I also paint my ‘serious’ paintings on cardboard, just because the way it takes the paint seems to be a perfect middle way between canvas and smooth panel. But I then glue the cardboard to an mdf panel.
The varnish is just a way to size the panel, ie to prevent it from absorbing the oil paint. Acrylic varnish will give you a rather slippery surface. Same for PVA glues like ‘Capaplex’ (very thin stuff). Lately I’ve been using plain acrylic gesso for this (talens). With this the paint doesn’t move as easily, ie you see less scratches/touch when adding paint.
Jos
Thanks I will have to do this when I get my paint. Question about acrylic varnish though. So I can buy that then paint it on cardboard instead of using canvas? Would save me a lot of money while I practice.
April 9, 2012 at 6:29 am #1159581I can recommend it.. And there is some alla prima technique in every layered painting: one has to add the paint when it is wet. So if you learn to be good at alla prima, your layerd paintings will also be better…………….
Thanks from me too. I’ll be sure to bookmark it when I get the courage up to take a break from my slow-and-steady layered technique and venture out into alla prima.
April 9, 2012 at 6:48 am #1159590Great tutorial! Thank you.
-
AuthorPosts
- The topic ‘Painting a pear – Step by step tutorial’ is closed to new replies.
Register For This Site
A password will be e-mailed to you.
Search