Home › Forums › Explore Media › Drawing and Sketching › The Classroom › Basic 101: Class 4 – Drawing Cylindrical Objects
- This topic has 540 replies, 2 voices, and was last updated 3 years, 9 months ago by
 I am new to drawing comunity. Hope you welcome me..
-
AuthorPosts
-
November 14, 2004 at 11:53 pm #988305
Basic 101: Class 4
Drawing Cylindrical Objects
BEFORE you start this week’s lesson go to the following tutorial
by Mike Sibley on the subject of ellipses.
[EDIT 2018
Warning There is an unfortunate wording in the method for finding the center. Literally it guides you to put the center on the perspective center of the square (under in blue), but the ellipse is a perfect symmetrical form, as is the circle (the center must be as in red).
The square in perspective is only used to find the correct length-width proportion. ]
Here is the definition of an ellipse:
Main Entry: el·lipse
Pronunciation: i-‘lips, e-
Function: noun
Etymology: Greek elleipsis
1 a : OVAL b : a closed plane curve generated by a point moving in such a way that the sums of its distances from two fixed points is a constant : a plane section of a right circular cone that is a closed curveSource: Merriam-Webster online
NOW
Here is the definition of our subject, the cylinder
Main Entry: cyl·in·der
Pronunciation: ‘si-l&n-d&r
Function: noun
Etymology: Middle French or Latin; Middle French cylindre, from Latin cylindrus, from Greek kylindros, from kylindein to roll; perhaps akin to Greek kyklos wheel — more at WHEEL
1 a : the surface traced by a straight line moving parallel to a fixed straight line and intersecting a fixed planar closed curve b : the space bounded by a cylinder and two parallel planes cutting all its elements — see VOLUME table
2 : a cylindrical body or space: as a : the turning chambered breech of a revolver b (1) : the piston chamber in an engine (2) : a chamber in a pump from which the piston expels the fluid c : any of various rotating members in a press (as a printing press); especially : one that impresses paper on an inked form d : a cylindrical clay object inscribed with cuneiform inscriptions
– cyl·in·dered /-d&rd/ adjectiveSource: Merriam-Webster online
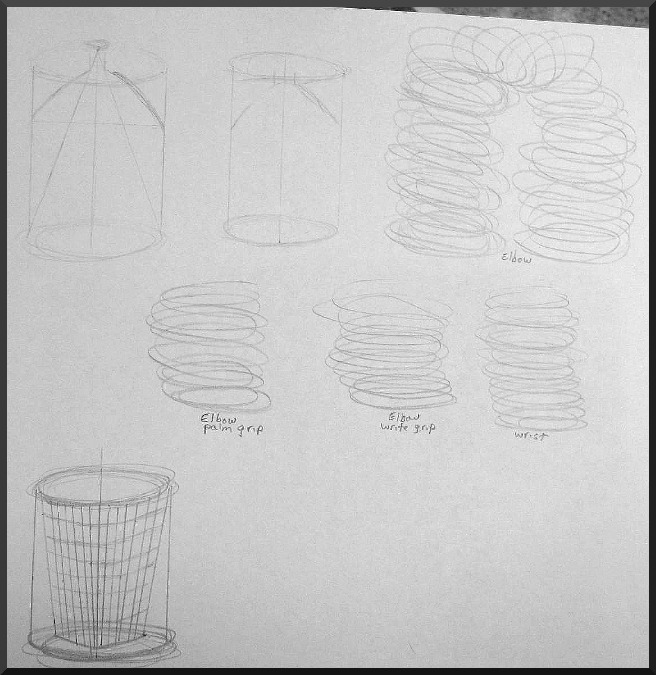
Good grief! All this time I thought that a cylinder was a tube. I guess the moral of the story is don’t get tangled up in too many technical points.Figure 1 is a Slinky—A slinky, besides being fun for every girl and boy, is a wonderful illustration of a cylinder in action. It lifts and it separates, don’t you know and so for our purposes it is a versatile model.
EXERCISE 1. Draw the diagram of the Slinky as I did . Do as many of these as your sanity and your time will allow. When you draw this object think about the cylinder that it IS and the ellipse’ that are contained with in—if you think about it, every coil is an ellipse and all of the combined coils make up ONE cylinder
Now look at figure 2. Let’s draw a cylinder sans Slinky:
1. First, decide how big, mall or wide that you would like your cylinder to be.
2. Start drawing by roughing in the ellipses, top and bottom. I generally move the pencil in a counter clockwise manner.
3. Next sketch in the sides and now you have your cylinder. Sounds simple.
EDIT 2015:
There is a very common confusion about the relative depth (“roundness”) of top and bottom ellipses, that is, the perspective of the cylinder – it must be counterintuitive.
Still it is easy to observe:
Take a glass or mug, look at the shape of the top rim while moving it up and down before your eyes. Observe where the ellipse becomes shallower, farther away or nearer to the eye level ?.Or shown in another way:
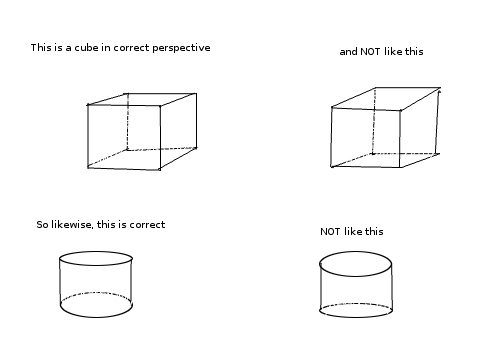
That said, drawing top and bottom equally deep is a good rule of thumb when the vertical distance to the eye level is not extremely different.
___________LEARN TO SEE, JUST LIKE THE CUBE, THE CYLINDERS THAT ARE IN THE OBJECTS THAT SURROUND YOU EVERYDAY.
Figure 3 is a demonstration of modifying a cylinder to make an object:
THE BOTTLE:
1. Start by drawing your cylinder like you did above.
2. Once you complete the cylinder draw the shape of the object WITHIN the cylinder. Shaping the neck and body of the bottle.
It is THAT simple. I have gone ahead and sketched out, using the cylinder, several other objects. Try your hand at them—then look around your house and see if you can find some more.
Here are the practice exercises (below) for this week. Several are drawings that I have completed but there are others that are just photos. Try to do at least ONE of these. If you happen to see a cube in the drawing—DRAW IT! Happy drawing!

catmandolin.deviantart.com
November 14, 2004 at 11:55 pm #1129203Here are the last images for you to try:
catmandolin.deviantart.com
November 15, 2004 at 12:02 am #1129204and finally, some more:
Note from the Editor: This thread continues with the recent posts. The older posts can be found in this closed thread:
https://www.wetcanvas.com/forums/showthread.php?t=230387
[/U][/COLOR]catmandolin.deviantart.com
November 10, 2009 at 8:06 am #1129240Anonymous
jarish –
These are very nice :clap:. In fact they are so nice that it is really a pity you did not check the centerline :o:
The ellipses have a good form, generally. The bottom of the glass has a little bump at 10 o’clock, but otherwise these are very good.
The key in another perspective is a fine attempt :thumbsup:. A few remarks perhaps: the ellipses on the shaft (the grooves) are a bit too pointy.
You’re doing very fine :music:.November 11, 2009 at 2:37 am #1129471Thanks arnoud,
Will take care of your instructions.Will do the rest soon.
Regards
JarishNovember 15, 2009 at 3:21 am #1129472Dear Arnoud,
Posting some more class 4 assignments. Please check these.CUP

Another CUP

Here some of my studies which i did from memory.
I dont know is these are too much !!


 November 15, 2009 at 12:21 pm #1129241Anonymous
Jarish –
Good job :thumbsup:.
These are very fine in general :clap:. Your weak point seems to be the symmetry.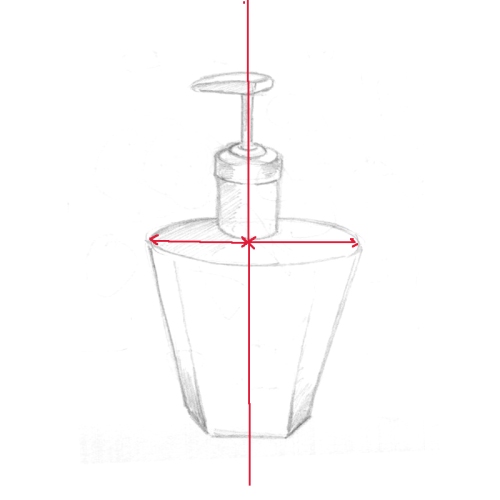
Take care to check the centerline, put your drawing upside down, look at it in a mirror.
Don’t forget the horizontal center either. Or is this a novel design, with the upper part eccentric on purpose?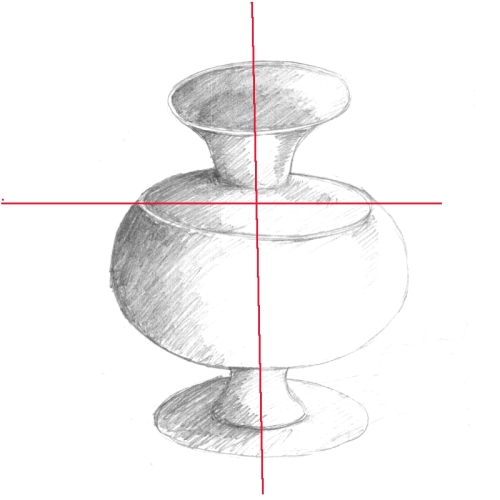
You were very dedicated in this class, please move on to class 5
November 15, 2009 at 1:37 pm #1129473Thank you soo much Arnoud.
See you in class 5.December 2, 2009 at 9:48 pm #1129478Hello Arnoud,
Here come the ellipses!
First exercise/attempts, Slinky loosen up, some glasses, cups, a sort-of foreshortened pencil, loosening up:
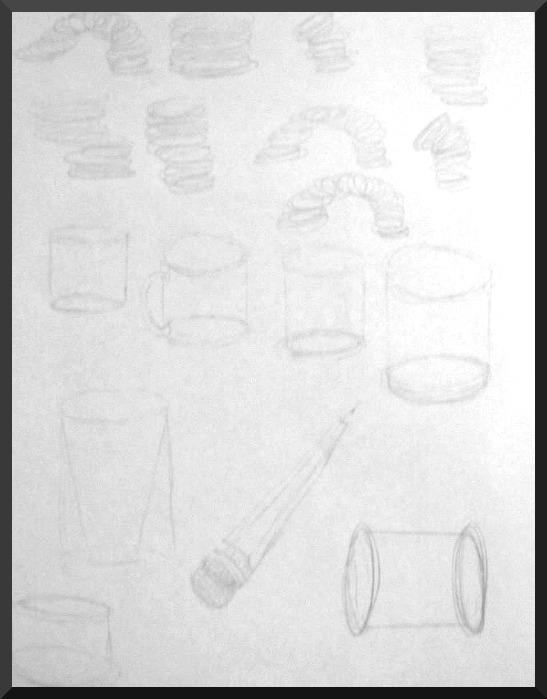
Next, more looseness/practice. more slinkys, done with wrist and elbow movement, a flask, a trash bin, feeling my ellipsoid way:
This one has a failed coffee cup, a bad vase, cups, glasses, still getting familiar with ellipses:
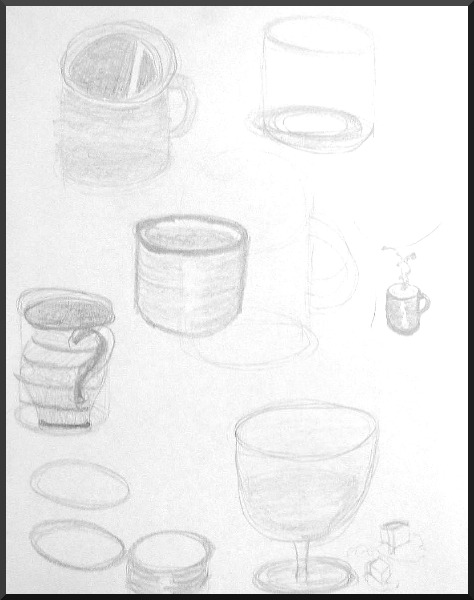
Then, today, I figured out why the coffee cup assignment has been so hard for me…..it’s fore-shortened! Armed with that revelation, and utilizing some perspective, I came up with this:

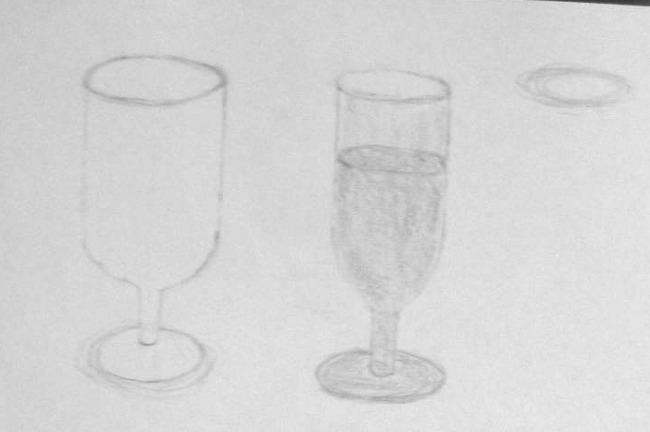
And finally, (thank goodness), a couple of wine glass practice sketches and a last ellipse. Pardon my bad shading, I will get to that class……eventually.
I hope you can see these OK, I tend to sketch with a light hand. Apologies in advance if I posted too many JPG’s.
Heatgain (Gary)
December 3, 2009 at 8:35 am #1129242Anonymous
Gary –
Your ellipses are very good :clap:. You seem to have a good eye for forms. And although these first classes are mainly concerned with the form, I’d advice you to start paying more attention to your “line quality”. If you finish with tonal shading, no need yet to interpret all the lights and darks completely, but try to get it a bit smoother. Don’t rush, go over it with many easy layers. A tip: letting the strokes follow the form in the first layer – slinky wise – helps to give it more depth. And you will hear it very often push the darks :lol:. You did very good to blend the outline into the shading, but try not to blur the outline too much.
As for “linear” finishing:I tend to sketch with a light hand
That is very good. My tip for you is when after the light exploratory strokes, you see which one is the correct one, to go over it with a decisive, expressive stroke.
You finished the assignments for this class, so move on to class 5 :thumbsup:.
As a good preparation for the higher classes, I’d strongly advice you to go a little farther than correctly sketching the forms, try to work towards a “finished” drawing :).December 3, 2009 at 10:35 am #1129479Thanks, Arnoud, you’ve been very helpful to me, and always right on the money.
All your suggestions have improved my drawing.Heatgain (Gary)
January 8, 2010 at 11:40 pm #1129480Here are my Class 4 assignments, one more finished than the other. The arrangement was drawn from life, and the wine glass is handmade and slightly tilted.
Martin

 January 9, 2010 at 4:09 am #1129243Anonymous
Martin –
These are all very good :clap::clap:.
I have no further comments, move on to class 5 :thumbsup:.January 15, 2010 at 1:07 am #1129483Here is my assignment. I thought I had picked the hardest picture but was determined to do my best. After I took the picture I could see I was off a little with the tall can. It looks like I am a little high on the left top which makes it look like it is leaning.:( I don’t understand, when I looked at it before I took the picture it seemed right now when I look at it it looks crooked.:confused: Should I re-do it? This one took me 4 hrs.

[FONT=Garamond][FONT=Palatino Linotype]Laurie- Art keeps me sane!
January 15, 2010 at 4:56 am #1129244Anonymous
Laurie –
Good work :thumbsup:.
Your ellipses are generally correct. I get the impression that you grew a bit impatient with the fixative bottle :lol:.when I looked at it before I took the picture it seemed right now when I look at it it looks crooked
That is very common :lol:. It helps to look at the drawing in a mirror, it will struck you that it leans the other way. It is good to start with drawing a faint centerline, with a ruler. It will blend in the shading or erased when finished. For the purpose of the classes, you can leave it in also.
Part of the bottle looks flat. That is because you forgot that features on the cylinder must follow the the “slinkies”. In this instance in particular the text and upper edge of the label which should be curved, and the circle which should be drawn as a distorted ellipse.
It is also good to choose the direction and form of the shading strokes deliberately. Many of your strokes are straight up and down or left right, taking the easiest direction. Let your strokes follow the curvature, slinky-wise, that will enhance the “roundness”.

Should I re-do it?
Not needed, but it would be useful to draw another simple object, e.g. a bottle, with centerline and slinkies to start with (look in the post before yours)
Keep up the good work :thumbsup:. -
AuthorPosts
- You must be logged in to reply to this topic.
Register For This Site
A password will be e-mailed to you.
Search