Home › Forums › Explore Media › Acrylics › The Information Kiosk › February Acrylics Classroom: a Layered Approach to Painting
- This topic has 80 replies, 22 voices, and was last updated 19 years ago by
 Einion.
-
AuthorPosts
-
January 31, 2005 at 10:05 pm #984789
February Acrylics Classroom: a Layered Approach to Painting
Greetings fellow WetCanvasers! I was introduced to acrylics some ten or fifteen years ago. After gluing one paintbrush into a solid mass and attempting to clog the sink with dried paint that I mistakenly thought was water-soluble, I got to the actual business of smearing pigment onto various surfaces – and wondering if there was a “right” way to do it.
A few years later and I know now that there isn’t one right way, of course – acrylics can mimic oils, watercolor, and gouache, and just as well it can do things that none of those other mediums can. But I also know that whatever you are trying to achieve, it helps to have some sort of method to get through those bewildering stages between empty canvas and finished product. This is something I finally understood when I stumbled across a children’s book by the name of Dinotopia.
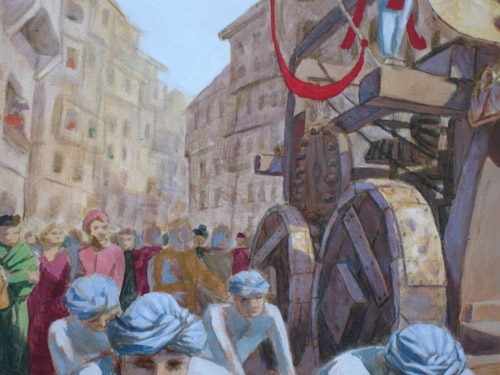
The following images are the work of artist and writer James Gurney, from the second book in his series, called “Dinotopia: the World Beneath.”
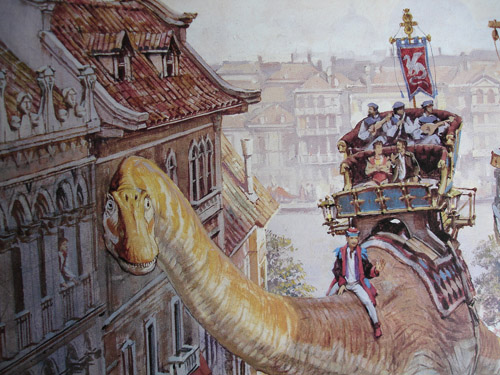
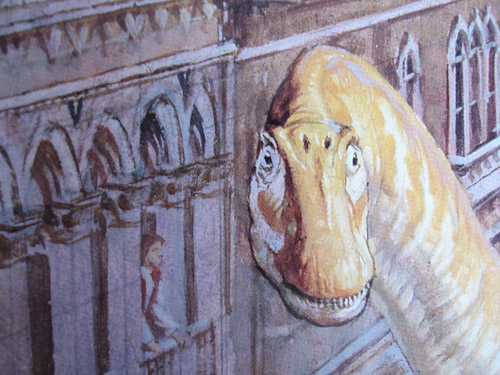
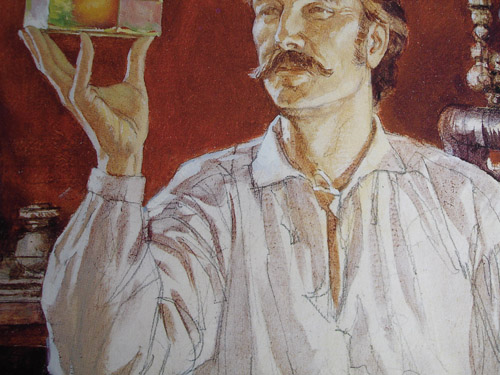
Gurney’s paintings are done in oils, but that doesn’t matter. What does matter are the pencil lines. Look closely, and you can see them all right there as a part of the finished image. On top of those plain lines are washes of pigment that look very much like watercolor. On top of *that* are globs of increasingly thicker paint, all the way to thick impasto. Some of the paintings in his books are little more than a drawing with light washes of browns. Others are fully-worked paintings topped with the markings of palette knives. (continued. . .)
Give back to your community - be a virtual mentor! http://www.icouldbe.org/start.asp
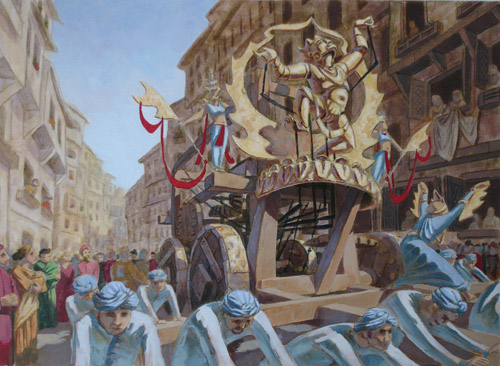
January 31, 2005 at 10:06 pm #1046028Gurney was following the steps of fat-over-lean that are required in oil painting, but I had the idea that the same steps could be used to produce a good acrylic painting. I started experimenting, and this is where I ended up:
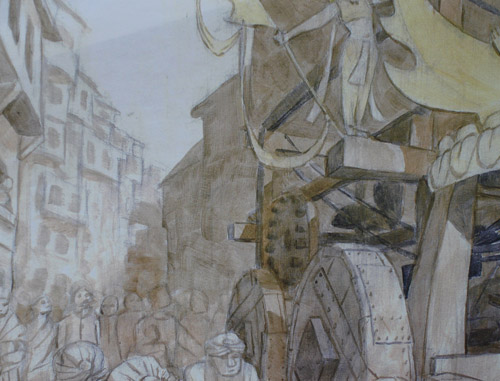
Partway through the painting I got paranoid that I was going to ruin it, so I ran out and had a color Xerox made. This is what the underpainting looks like:
So here’s how I did it:
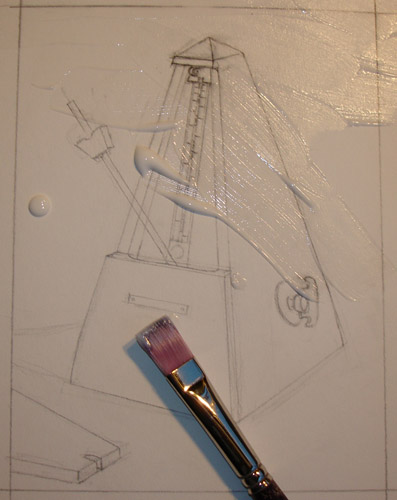
The first step was a pencil drawing on illustration board. Probably half of the total time I spent was in getting that drawing right. (And yet I still bungled the legs on that mechanical figure. . . sigh.) Once the drawing was finished, I brushed a layer of matte medium over the whole drawing. The matte medium was to prevent me from obliterating parts of the drawing as I repeatedly dragged my brush-hand across the surface (which I do a *lot*), and to remove what little absorbency the illustration board has. Without the illustration board sucking water out of the paint, I’ve sometimes got a few seconds to wipe away wet pant when I mess up.
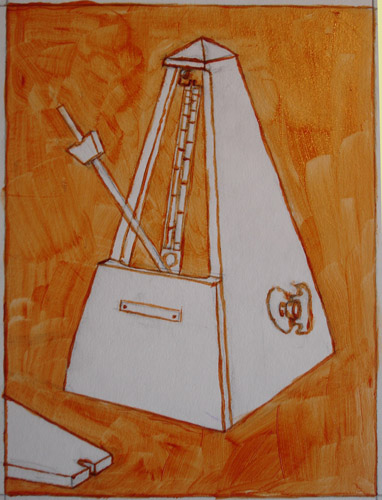
Anyway, after the matte medium was dry, I painted glazes of various neutral colors to establish the tonal range of the picture. I used this to establish the tonal range of the image.
In between the partially-finished version and the fully-finished one, I added additional washes of brown, and then I began to paint on top of that with opaque, saturated colors. You may notice that I never did paint an opaque layer on the buildings, though. They seemed done as they were, somewhat to my surprise. (continued. . .)
Give back to your community - be a virtual mentor! http://www.icouldbe.org/start.asp
January 31, 2005 at 10:07 pm #1046029If you are new to acrylics or new to this approach, rest assured that you don’t need to take on imagined scenes filled with multiple figures and two-point perspective in order to paint something wonderful. Start simple. Set up a still life. Point a desk-lamp at it, and follow along.
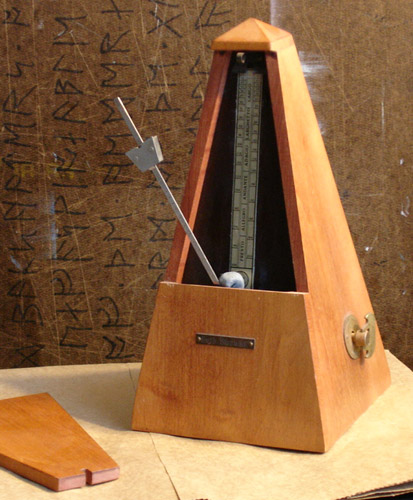
Here’s my still-life:
My whole set-up looks like this:
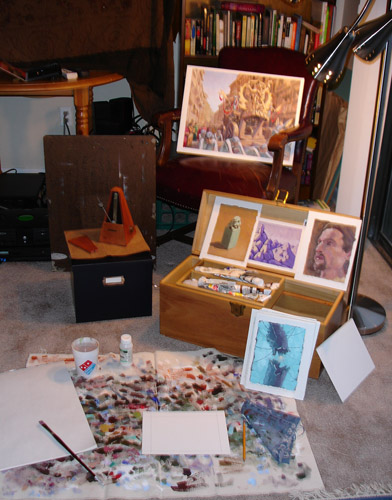
This painting is going to be six inches by eight. I’ve measured out the dimensions on a piece of illustration board, and I’ve set up my workspace. You may notice that my studio is a wooden box and a piece of canvas on the floor. I’ll have to upgrade when the urge to paint giant canvasses overtakes me, but for now, my studio is the living room floor.

Paper and gessoed canvas and board can also work with this technique, but I prefer illustration board because it doesn’t wrinkle like paper can, and it can be drawn on and erased from repeatedly with ease.
I picked this subject matter because it is simple, because it only has a few colors in it, and is made up of flat surfaces. If you are new to acrylics and wondering where to get started, these are good qualities to pick in a still-life. (continued. . .)
Give back to your community - be a virtual mentor! http://www.icouldbe.org/start.asp
January 31, 2005 at 10:08 pm #1046030Here is the most important step: get the drawing right! Get the composition set up just the way you want it, and make sure the proportions and perspective are good. This method of painting doesn’t leave a lot of wiggle-room for adjusting these things after the drawing stage.
If you are very new to painting, I will warn you that the most simple objects can also be the most difficult to paint – and the best practice. A teacup, and empty vase, a cardboard box, a toothbrush, an egg – these are all items require a lot of looking. A basic understanding of perspective is very helpful, but if you haven’t had the opportunity to learn about that, don’t worry about it. The best way to learn is to look at an object in front of you, and draw what you see.

Once that drawing is in place, brush matte medium across the surface. Gloss medium would probably also work well. Don’t be at all surprised if the graphite from your drawing is smeared in the process. That’s okay. Once the medium dries, it can’t smear any more, and you’ll be covering up the smudgy bits with paint.
There are probably spray-fixatives that would do the job, too. In fact, I think that’s what Gurney uses to seal his drawings, though I can’t remember where I heard that. If you do use spray fixer, just be sure to do it outside. It’s toxic, and your painting will emit nasty fumes for days.
If at this point you’d rather use oil paints, I’ve never tried it so I can’t offer any pointers, but if you mess up, you should in theory be able to wipe the paint right off of the drawing and start over. (continued. . .)
Give back to your community - be a virtual mentor! http://www.icouldbe.org/start.asp
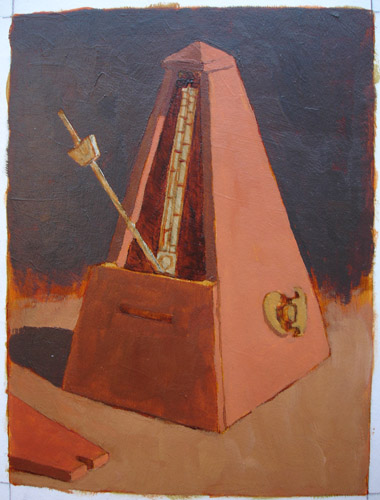
January 31, 2005 at 10:09 pm #1046031For acrylics, at this point it’s best to pick a neutral color. I like burnt umber, or burnt sienna mixed with hooker’s green. But don’t be afraid to experiment. I had a great time once painting a red landscape on an eye-poppingly green underpainting, and on another occasion I succeeded in making a landscape look downright frozen by making the under painting a brilliant blue.
In this case, I’m using the burnt sienna/hooker’s green mixture, since I am out of burnt umber.
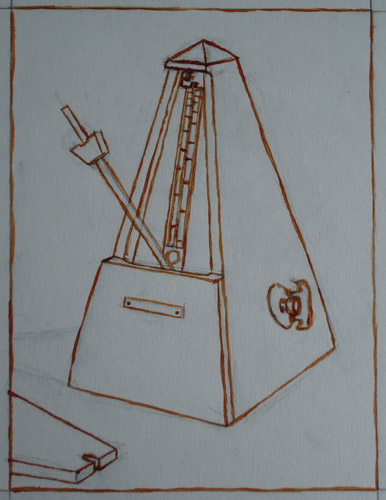
I’ve made sure to cover the entire surface with at least a little pigment. This prevents the problem of later having specks of white board glaring out between brush-strokes. (continued. . .)
Give back to your community - be a virtual mentor! http://www.icouldbe.org/start.asp
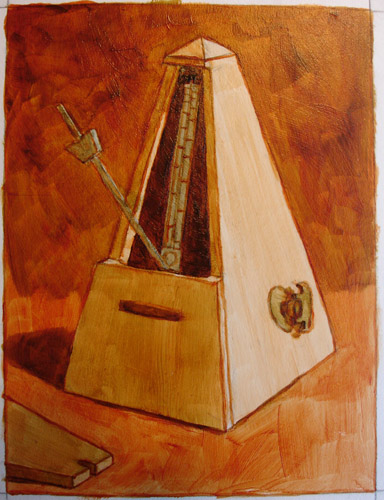
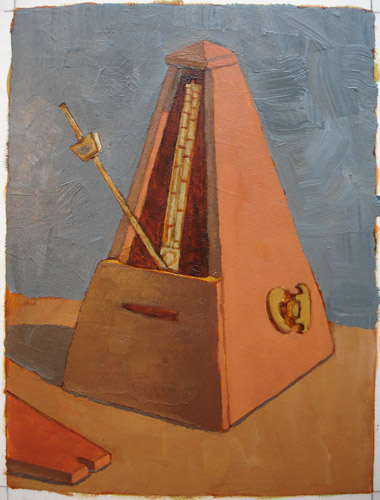
January 31, 2005 at 10:10 pm #1046032At this point, I’m satisfied that I’ve accurately caught the value-range of my metronome. Now it’s time for color. If I remember correctly, I used burnt sienna, hooker’s green, raw umber, and titanium white here. I’m trying to keep my palette simple because every color adds complexity, and those darn colors can get out of control in a hurry. I’m not thinning the paints with anything.
My metronome has turned out to be a yucky salmon-color, and I’m not at all happy with the dark background, so I intervened at this point by draping a blue cloth behind the metronome. I’ve broken out the ultramarine blue and a wee bit of cadmium yellow. I also go back in with my dark hooker’s green/burnt sienna mixture to re-paint the dark lines in certain places.
One final adjustment of colors, and some pesky details, and here’s the final picture:
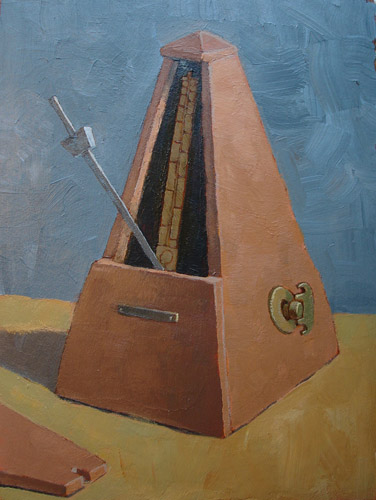
There you have it! I hope this has been helpful. Please try this technique for yourself and post your results here! If you have any questions for me, just ask, and I will do my best to answer.
Cheers!
Give back to your community - be a virtual mentor! http://www.icouldbe.org/start.asp
February 1, 2005 at 3:49 am #1045998wow, thankyou for posting this, it has been a very interesting read and i have learnt alot from it. i think i am going to give it a go ! .. my only problem is finding something i want to draw/paint, i seem to be stuck !
but again thanks again i think i will definately come back to this post again
 February 1, 2005 at 4:25 am #1046001
Excellent Michelle – thank you so much – this should be of great help to anyone with uncertainties……….also loved the illustrations you used at the beginning……thanks again

Cheers, Maureen

Forum projects: Plant Parade projects in the Florals/Botanicals forum , WDE in the All Media Art Events , Different Strokes in Acrylics forum .February 1, 2005 at 7:05 am #1045997Hi Michelle,
Wonderful first lesson, this will be a great class!
I use a spray workable fixative to secure my drawings. It works very well, spraying takes about 20 seconds and it’s dry ready for paint in about three minutes.My Website
Glossary of Art Terms Beginners Guide to Wet Canvas Upload Images FAQ's on WC Make a Signature Banner Knowledge Base
 February 1, 2005 at 8:03 am #1045988
Brilliant lesson. Thanks for all the details and descriptions. These are very important in helping to teach the concept. I think you have done a wonderful job getting this together.
Carol
"Mercifully free of the ravages of intelligence" - Time Bandits[/color]
Moderator: Acrylic Forum
My websites: Discoveries With Colour Adventures in Photography[/B]February 1, 2005 at 8:36 am #1046033Oy, thanks you guys! *happy dance*
Sanne – you could try any old thing that you’ve got lying around, even as dull as a tube of toothpaste. Look at a tube of toothpaste long enough and it becomes fascinating! I keep meaning to find a perfect cardboard box to paint, myself.
Charlie’s Mum – thanks! I know the paint’s dried and all, but can you make the thread sticky?
Marty c – *chuckle* I’m glad the spray stuff is working for you. I’ll stick to the gooey stuff – it smells better.
Lady Carol – I’m sure I’ve forgotten something. . . if you figure it out, let me know.
Cheers!
Give back to your community - be a virtual mentor! http://www.icouldbe.org/start.asp
February 1, 2005 at 9:15 am #1046034I just started sister threads to this in both the digital and oil forums, in case anyone is interested in trying the same techniques in either of those mediums:
Digital: https://www.wetcanvas.com/forums/showthread.php?p=3165886#post3165886
Oil: https://www.wetcanvas.com/forums/showthread.php?p=3165912#post3165912
Give back to your community - be a virtual mentor! http://www.icouldbe.org/start.asp
February 1, 2005 at 3:47 pm #1046002Sorry I can’t ‘sticky’ this Michelle – but it does have an arrow icon (I asked the Mods to do that this morning) and it also has a link from the sticky Classroom and Project thread which keeps track of all the monthly ‘happenings’ in the forum
Cheers, Maureen
Forum projects: Plant Parade projects in the Florals/Botanicals forum , WDE in the All Media Art Events , Different Strokes in Acrylics forum .February 1, 2005 at 4:18 pm #1046025Thank you so much for this wonderful lesson!
Just when I was getting discouraged you showed up! Hey, That looks just like the Seth Thomas on my piano – got it for my birthday in 1964. Now , a late blooming painter, I’m told I have more talent for painting than the piano. Wish they’d told me that in 1964! Thanks again for making it easier! Now I can see what my little paintings were lacking and why they looked scratchy and thin. LAYERS!!!BTW The first thing I was told about acrylic painting was to never draw your picture in with a pencil – thank for giving us the OK to do that!
Barbara
"Painting is an attempt to come to terms with life. There are as many solutions as there are human beings."
George Tooker 1920 - 2011February 1, 2005 at 8:12 pm #1046054Thank you very much for an excellent class. I must admit that I was as impressed by your workspace as much as the quality of your work. Do you work on your knees, cross-legged, or laying down. You certainly leave no room for whining to those of us convinced that one more piece of equipment or supplies will make us really good painters. Thanks again.
-
AuthorPosts

- You must be logged in to reply to this topic.
Register For This Site
A password will be e-mailed to you.
Search