Home › Forums › Explore Media › Watercolor › The Learning Zone › mounting watercolor paper
- This topic has 16 replies, 10 voices, and was last updated 5 years, 10 months ago by
 hoylander.
-
AuthorPosts
-
May 20, 2018 at 4:32 pm #456323
I like to mount my paper on boards of various kinds.
I have several scrap sheets of good watercolor paper and want to make a large mounting. I would like to butt together two sheets to make a large mounting, but whenever I do this, the seam always shows. Do any of you have ideas on how to make a seamless butt joint with two sheets?
I know it can be done pretty well with wallpaper.
thanks, DerekWebsite: www.artderek.com
DEMONSTRATIONS:https://www.wetcanvas.com/forums/showthread.php?t=1363787
https://www.wetcanvas.com/forums/showthread.php?t=1343600
https://www.wetcanvas.com/forums/showthread.php?t=1431363May 20, 2018 at 5:24 pm #625470You can’t overlap different pieces of watercolour paper as you do with the wallpaper.
The only thing that you can do is to cut completely straight the edges of the papers and mount them with acrylic medium on your boards. If they are cut completely straight the seems will not be visible especially after you’ll paint over the mounted papers.May 20, 2018 at 8:44 pm #625463Marialena: thanks, I’ll try that.
Website: www.artderek.com
DEMONSTRATIONS:https://www.wetcanvas.com/forums/showthread.php?t=1363787
https://www.wetcanvas.com/forums/showthread.php?t=1343600
https://www.wetcanvas.com/forums/showthread.php?t=1431363May 24, 2018 at 11:37 pm #625465Derek, I have no advice to give on this issue, but I do like the idea of mounting watercolor paintings to boards – though I haven’t done any yet, so I’d love to hear your process.
For instance, what types of boards do you use? Do you gesso them? What products do you trust to adhere the paper to the board? Do you varnish the watercolor or seal it with a spray? Anything else important that I may have missed? :confused:
I’ve heard of another person or two displaying their art work this way, so I’d love to know how it is done. Thanks!
 May 25, 2018 at 8:28 am #625466
It’s just about impossible to cut two perfectly straight lines but you can cut two curves that exactly fit together. Overlap the two sheets you want to join. Temporally tape them down to your cutting table except the edge you are going to cut. Use a straight edge to flatten the cut edges together and use a very sharp knife. I prefer an oversize box cutter with break-off tips to get a new cutting point. Press down on the straight edge and cut through both sheets with a single stroke.
It is only on a basis of knowledge that we can become free to compose naturally. -- Bernard Dunstan
blog.jlk.netMay 25, 2018 at 11:41 am #625477I recently discovered fabriano artistico comes in double-imperial if the object is to get a larger sheet to work on. You can get paper by the roll too, but it’s quite an investment!
May 25, 2018 at 8:38 pm #625468It’s just about impossible to cut two perfectly straight lines but you can cut two curves that exactly fit together. Overlap the two sheets you want to join. Temporally tape them down to your cutting table except the edge you are going to cut. Use a straight edge to flatten the cut edges together and use a very sharp knife. I prefer an oversize box cutter with break-off tips to get a new cutting point. Press down on the straight edge and cut through both sheets with a single stroke.
This works well. If a curvy line would serve your art, you can cut a freehand line this way also. In either case, the key is to cut both pieces at once and ensure that nothing moves while you’re doing it.
Why use a curvy line? To make it a feature, not a bug!
 CK =)
CK =)
I take great comfort in knowing that my genuine typos will probably be blamed on some device's autocorrect.
DIY art supplies, sketches, and more: cyntada.com / @cyntadaMay 26, 2018 at 7:02 am #625469He’s merely saying that even if you cut with a ruler, your cut will never be 100% perfectly straight. Not that he’s suggesting a visibly curved line. Your “straight” ruler will actually produce a curved line, and therefore each lone cut will not match up perfectly with another.
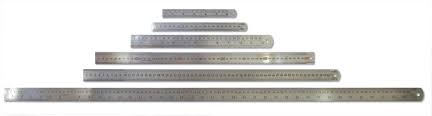
May 26, 2018 at 9:54 am #625471Hey… I was talking about a steel ruler and a craft knife. You can get both from the hardware stores at a very affordable price.
My 1 meter steel ruler cost me 6 euros and the large craft knife another 2.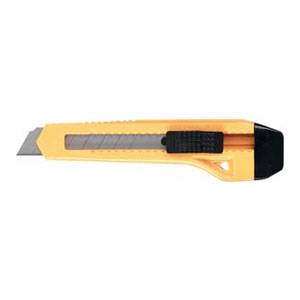
 May 29, 2018 at 6:58 pm #625464
Good answers all…..thanks.
Website: www.artderek.com
DEMONSTRATIONS:https://www.wetcanvas.com/forums/showthread.php?t=1363787
https://www.wetcanvas.com/forums/showthread.php?t=1343600
https://www.wetcanvas.com/forums/showthread.php?t=1431363May 29, 2018 at 7:35 pm #625478One problem that you likely won’t be able to overcome even if the joint is absolutely perfect – paint will soak in along the cut edges, penetrating into the body of the paper, producing darker, visible lines at the junction.
You could seal the paper with a clear acrylic medium and paint on the patchwork panel with oils or acrylics and possibly be able to hide the joints.
May 29, 2018 at 8:06 pm #625467And how will you protect this painting on boards once completed?
Sling paint,
VirgilSling paint,
Virgil Carter
http://www.virgilcarterfineart.com/May 30, 2018 at 3:51 am #625472One problem that you likely won’t be able to overcome even if the joint is absolutely perfect – paint will soak in along the cut edges, penetrating into the body of the paper, producing darker, visible lines at the junction.
You could seal the paper with a clear acrylic medium and paint on the patchwork panel with oils or acrylics and possibly be able to hide the joints.
If the papers are properly glued with the acrylic medium on the boards this will not happen. The trick is to apply the acrylic medium ( that is better than any glue) evenly. The best way to do this is by using a plastic cart ( like the credit cards) and spread the medium like butter on the board. As evenly as possible.
Then you place the paper and you press it down either with your hands ( that has to be clean) or with a soft cloth from the middle of the paper to the edges.
The excess acrylic medium on the other side of the board that you are going to glue the other paper you spread it further with the card and the rest you use it to seal the edges of the paper.If the papers are straight and properly placed on the board the joints will not be visible.
June 2, 2018 at 1:04 pm #625475I think Marialena, you are talking about mounting the piece after it has been painted?
I have tried many times to join two pieces together and no matter how good of a join you have the water+paint will always behave differently around the edge and the joint will always be visible. Unless you seal the paper, but then, why use watercolor paper at all?
June 2, 2018 at 3:35 pm #625473I think Marialena, you are talking about mounting the piece after it has been painted?
I have tried many times to join two pieces together and no matter how good of a join you have the water+paint will always behave differently around the edge and the joint will always be visible. Unless you seal the paper, but then, why use watercolor paper at all?
No before. You have to mount the paper before you paint it. Back in the old days that we didn’t have illustration boards and there were not available very thick papers ( above 600 gsm that are actually thick as illustration boards) we did that very often ( and not even with acrylic medium that wasn’t available either back then).
The edges will not be affected if you spread the acrylic medium evenly on the board and you press down the paper from its center to the edges.
You’ve got to be careful though not to scratch or spoil the surface of the paper with the medium, while you push it down to stick on the board.
I used to use a roller like this one, with a thick elastic cylinder, one of those what we used back then to spread ink on the press machines ( clean not with ink! :lol:)
over a piece of transparent paper that I placed it over the surface of the paper.
Let me repeat the steps for doing so.
Use a plastic card to spread the acrylic medium on the board. The area of each paper separately.
Then place the paper on top.
Press it down from the middle to the edges either with your clean hands, or a roller, or with a soft clothe ( protect the surface of the paper somehow. Don’t scratch it with your nails).Use the excess medium that is in the edges to seal the edges. Spread the excess medium in the middle to the other side of the board. Apply more acrylic medium. Place the next paper and do all the same.
At the end place the board flat under some weight, ( books or something ) until it dries.
If you have a press even better.If you don’t put another board over the transparent paper that is over the paper, stuck on this something heavy and leave it there for a couple of hours.
It is easier and less complicated than it sounds.
-
AuthorPosts
- You must be logged in to reply to this topic.
Register For This Site
A password will be e-mailed to you.
Search