Home › Forums › Explore Media › Drawing and Sketching › The Classroom › Basic 101: Class 5 – Drawing Spherical Objects
- This topic has 498 replies, 119 voices, and was last updated 4 years, 1 month ago by
 olliewood0702.
-
AuthorPosts
-
November 21, 2004 at 11:03 pm #988310
Basic 101: Class 5
Drawing Spherical ObjectsBalls, Balls, Balls, Balls and more Balls. We all remember “The Cain Mutiny” with Humphrey Bogart insanely scrambling those steel balls around in his hand. Insane.
Balls are spheres. Simple enough. Balls are spheres and spheres have 3 dimensionality and depth (see figure 1). Going back for a second to the class on the cylinder we remember that to construct and object using a cylinder we first look for the geometric shape then sketch it and finally add the detail that make the cylinder turn into “the object”. Simple enough.
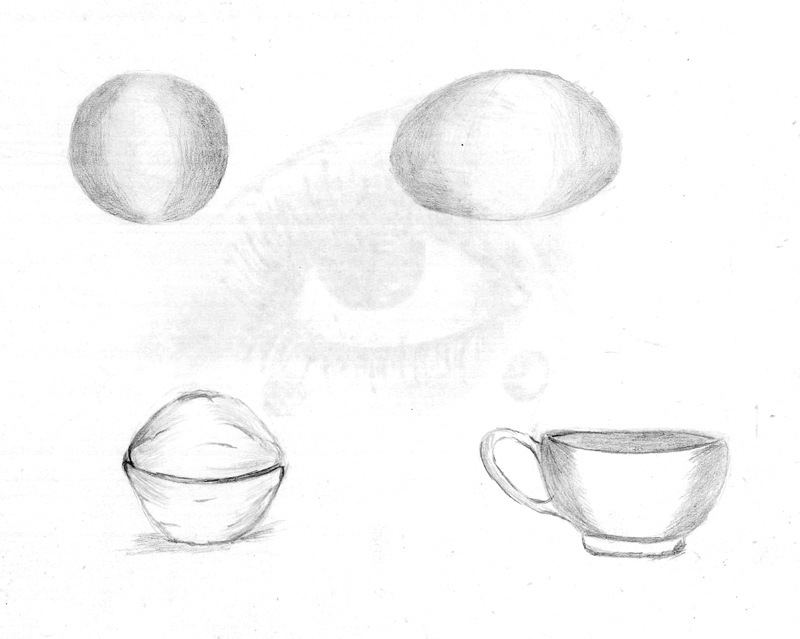
It is the same with spheres. Spheres can be Bogey’s steel balls or they can be marbles or basketballs or the planet Mars—HEY! How about your head!–all are spheres. Let’s look at the incredible edible egg for a simple demonstration:
Step 1–Draw your circle—be sure to indicate depth
Step 2–Add detail. In this case, draw and extension from the existing sphere to make the egg
Again, very simple. Let’s do a nut:
Step 1–Draw the sphere and indicate depth
Step 2—Draw the line that divides the nut into two halves
Step 3–Add the “tail” to the nut
So the idea is to always draw the sphere first.
Let’s do a cup of coffee
Step 1—draw the ENTIRE sphere—indicate the depth of the sphere
Step 2—draw and ellipse through the center of the sphere
Step 3—Add detail (the handle and the base of the cup (keep in mind that the base of the cup is also an ellipse.
Keep in mind that a sphere IS NOT A FLAT DISK –this is extremely important.
Exercise 1—Go about your house and see if you can find and sketch evidences of spheres living among you. What about on the streets—do you see anything there and HOW about in nature—look about and sketch spheres in ALL of these environments.
Exercise 2—Draw the M&M dispenser—I want all of you to do this one as a class project. In this Exercise not only are you to draw the spheres but I want you to help each other draw this subject as a CLASS PROJECT. Remember to start out simply and then build details once you have the basic shapes down.Exercise 3. Listed below are are a series of photographs. See if you can spot the spheres an then using your new found spheres—draw the pictures—be on the lookout for other class subjects as well.
Good Luck and Happy Drawing!!!
catmandolin.deviantart.com
November 21, 2004 at 11:04 pm #1129795And here are the rest of the excercise pieces:
Note from the Editor: This thread continues with the recent posts. The older posts can be found in this closed thread:
https://www.wetcanvas.com/forums/showthread.php?t=231940
[/COLOR]catmandolin.deviantart.com
November 23, 2009 at 4:16 am #1129830 Anonymous
Jarish –
Very nice work :clap:.
A few useful pointers for the future:
M&M: the outlines of spheres are always drawn as circles, in whatever perspective, although mathematically incorrect. But features on the sphere do follow the perspective. The nameplates look as flat plates, sticked-on, but on the reference they look like painted. To distort features you can use a modified “gridding”, where the target grid is drawn in the desired distortion. In this case the target grid is following the longitude and latitude circles: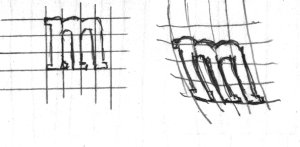
Man Ray: very nice. Again, with this extreme perspective, the iris should be more an ellipse, less a circle. Eyes are extremely important in portraiture. Any detail counts. For instance, eye lashes do not grow from the very edge of the lid, that would be very irritating :lol:. Look at this detail of another Man Ray photo from the same session.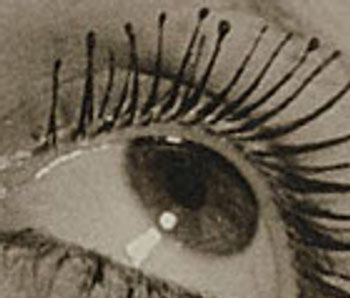
In general, but it struck me in particular in the kid’s head, don’t be afraid of the dark.
You did very well in these introductory classes :clap:. You may now choose the classes in any order :thumbsup:.
Keep up the good work :).November 23, 2009 at 4:25 am #1130034Thanks alot Arnoud for your valuable instructions. I will do my level best to follow the principles.
Please do let me know which class will be better for me to start.
Thanks & regards
jarishNovember 23, 2009 at 12:28 pm #1129831Anonymous
Jarish –
Please do let me know which class will be better for me to start.
The setup of this classroom is well structured. That means that there are still several classes that address general skills. Later; let’s say from class 14 on, come specific subjects. IMO classes 7, 8 and 10 are very important; they introduce you to the basic principles of composition and to realistic shading.
Afterwards, most pupils have a good idea of which classes appeal to them.November 24, 2009 at 1:39 am #1130035Alright Arnoud.
thanks for the knowledge. Anyway Im gonna continue the following classes on the right order. See you in the Class 6.Thanks & Regards
Jarish MuhammedDecember 9, 2009 at 4:44 pm #1130040Hiya Arnoud and whoever’s looking in here,
Just got back from a small trip to New Mexico and Colorado, which is why I haven’t yet done my Class 5 drawings. I did sketch a few eclectic things while I was out there, and dozens of circles. Funny, I feel the sketches look like they were done by a child. When am I going to became an artist?!!

Anyway, while I was in the airplane, thinking about circles, I look out the window at the ground, and what do I see? Circles! Apparently, the farmers do this on some plots, I don’t know why. I thought you might find it interesting:


Apologies if this is off-topic. (Although they ARE circles, in perspective :)). I’ll get busy in the next few days with my assignment.Heatgain (Gary)
December 9, 2009 at 5:49 pm #1129832Anonymous
Gary –
Interesting
Grain circles ?
Circles! Apparently, the farmers do this on some plots, I don’t know why
The result of one kind of large scale irrigation system
http://en.wikipedia.org/wiki/Center_pivot_irrigationDecember 13, 2009 at 7:23 pm #1130041Good evening Arnoud,
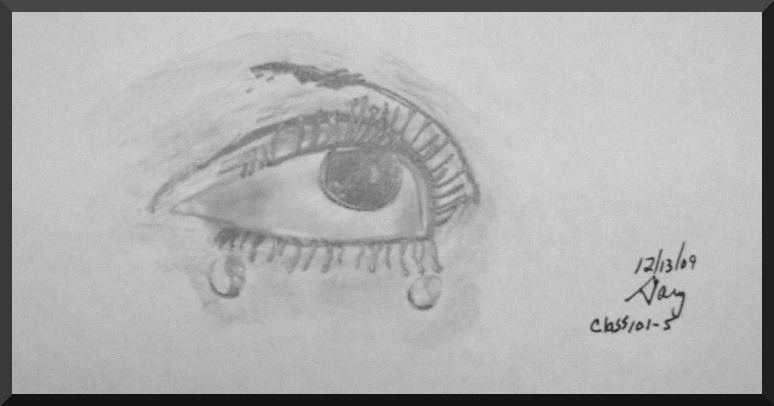
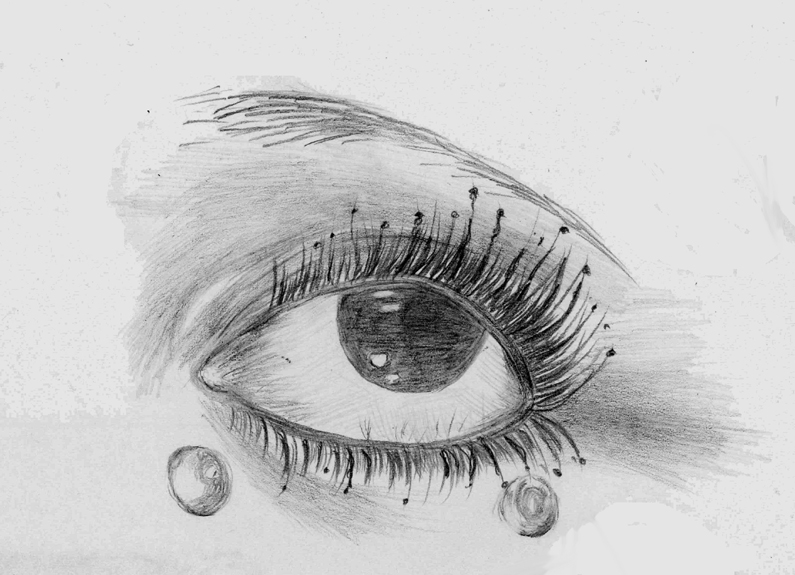
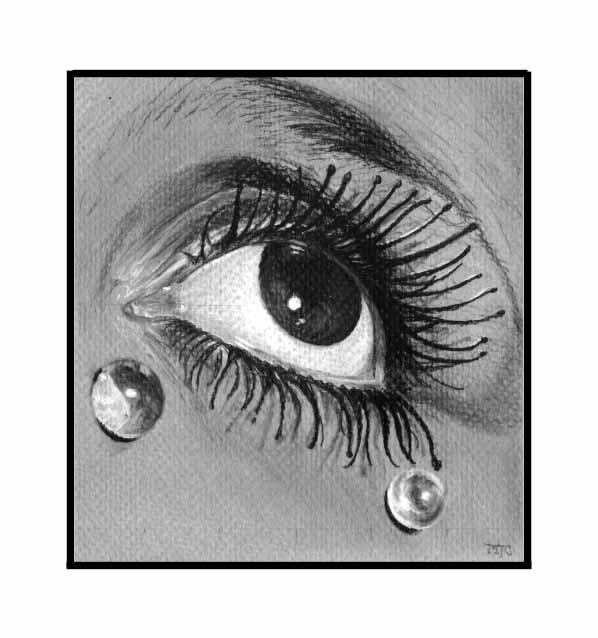
Finally! I’m back on assignment mode. After my mini-trip to New Mexico, what with all the RL stuff that piled up while I was gone, it’s been a slow climb for me back to drawing for class. At least I did a few sketches out there….but nothing with circles :). Here’s my drawing of the Man Ray eye, complete with two blobs that are supposed to resemble drops.
I’ll finish the rest of the assignment tomorrow, I hope.
Heatgain (Gary)
December 14, 2009 at 5:20 am #1129833Anonymous
Gary –
Your pre-class drawing is a portrait, so I take it that’s where your main interest lies. Then correct proportions are very important. There is no shortcut: practice, practice, compare, don’t rush.
Putting reference and sketch side by side can help already a lot to see where you deviate: width of the eye, height of the brow, gap between the eye and the “blobs”, form of the iris. BTW, the angle is an important artistic concept in this surrealist photo.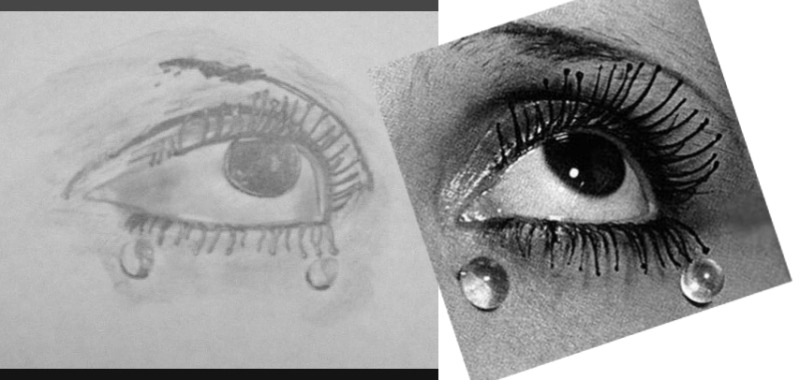
An even stronger software tip is described in this article[/URL].
Then after the correct forms and proportions come the line quality and shading. That is for later classes, but I think you could start paying more attention to it. I wonder whether your pencil is kept sharp. So that you can draw crisp lines with the point and broadly shade with the side (in underhand position :wink2:). There is a good explanation in this post. If you hate sharpening, you could use a 0.5 mm mechanical for the sharp lines :lol:.
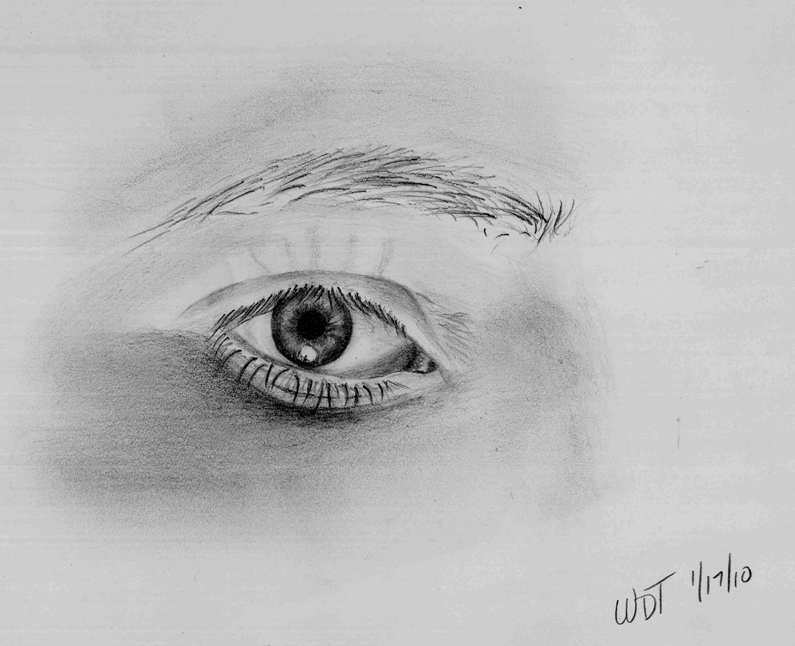
January 18, 2010 at 11:18 am #1130048Here are my class assignments. I did the eye because I really drawing eyes. They seem to be the personality of the portrait. Unfortunatly, the scan didn’t come out like I hoped. I am also doing the WDT this week and it is eyes also so I am including my sketch with that also. It took quite a while to do the M&M’s I kept messing up where the eyes and mouth should be in the sphere…

[FONT=Garamond][FONT=Palatino Linotype]Laurie- Art keeps me sane!
January 18, 2010 at 6:10 pm #1129834Anonymous
Laurie –
Very nice work. Only a few remarks, all to do with “draw what you see”, which actually means learn to see.
Although the cup stands on a flat table, the bottoms of cylindrical objects show as an ellipse, don’t draw it straight.
There are 2 errors of perspective in the drawing of the ManRay eye. No geometrics here, just look.
A. because of the low viewpoint the lower lid is almost straight. Think of the latitude lines on a globe, the equator looks straight, towards the poles they become more curved.
B. When seen straight on, the iris and pupil are circles. But seen sideways – which means in perspective – circles become ellipses!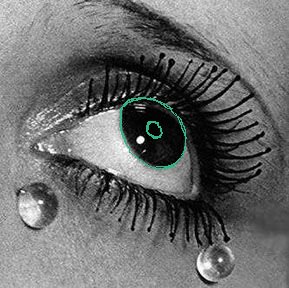
Ken will comment on the second eye in the WDT. For the benefit of other pupils, not necessarily reading the WDT, just one point: eyelashes on the upper lid do not grow straight down. They start downwards, then curve up. It is not very clear in this particular reference, but look at the other photos, or your own eye :lol:. Choose the direction of your pencil strokes consciously, the funny effect of the eyelashes is very apparent because they taper off downwards.Here is a blowup of the reference:
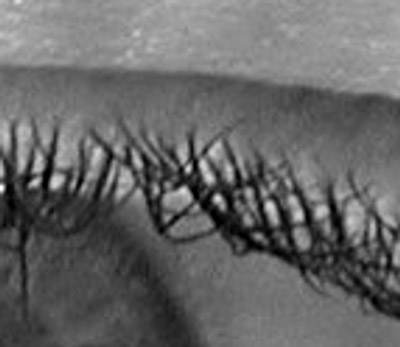
You see that they taper off upwards.
You finished the introductory classes succesfully :clap:. You may now take your favorite classes in any order.January 18, 2010 at 6:57 pm #1130049Thank you Arnoud, you have been very helpful. It is amazing how now when I look at things I see, cubes, cylinders, elipices, globes, horizons, vanishing points. I am really enjoying these lessons. My challenge is to get it on paper.
[FONT=Garamond][FONT=Palatino Linotype]Laurie- Art keeps me sane!
January 22, 2010 at 10:43 am #1130042Hello, Arnoud. Here are my exercises for class 5. The first is a sketch of a piece of black glazed pottery that we brought back from a trip from Oazaca, Mexico.
Thanks, Martin
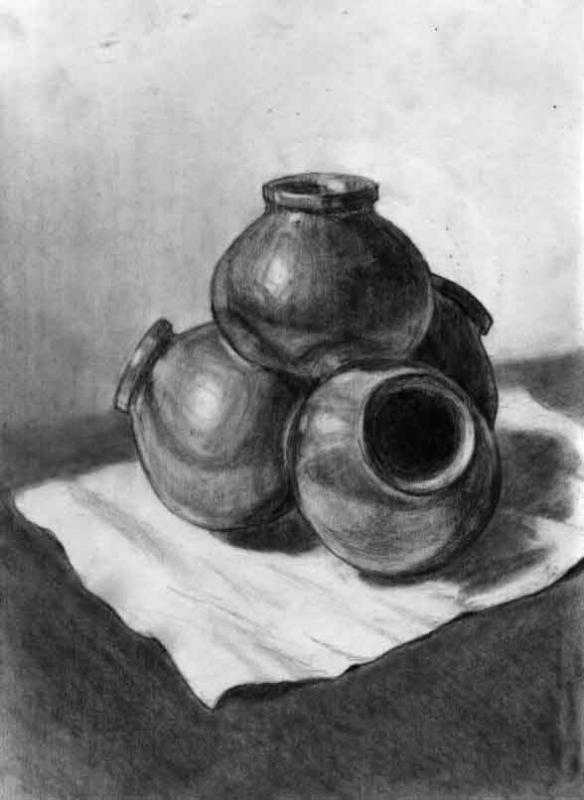
 January 22, 2010 at 11:58 am #1130043
Sorry, typo there. Its “Oaxaca” (pronounced wa-HA-ka).
-
AuthorPosts
- You must be logged in to reply to this topic.
Register For This Site
A password will be e-mailed to you.
Search