Home › Forums › Explore Subjects › Florals and Botanical › The Floral and Botanical Greenhouse › Making a Gallery – my way …. others to follow?
- This topic has 0 replies, 1 voice, and was last updated 13 years, 6 months ago by
 Striver.
-
AuthorPosts
-
October 24, 2010 at 10:38 am #448425
Here is my way for making galleries for forum project threads.
Others may well have different ideas and I’d welcome your versions added to the thread.:)We do need to keep these galleries within WetCanvas, so they must be uploaded via this site. If you use an external host for making a gallery, please be sure it can be downloaded to your own computer first and then uploaded here.
It’s important not to just give a link to an external site as, if you ever remove the gallery/image from that site, it will also disappear from the WetCanvas thread.We assume members agree to us downloading their images for this purpose but it’s not fair to assume members agree to you having the images permanently on an external site. There could be a copyright issue!!!
***********************I use PaintShopPro 8 … PSP8. Others may have different software.
Making a Gallery
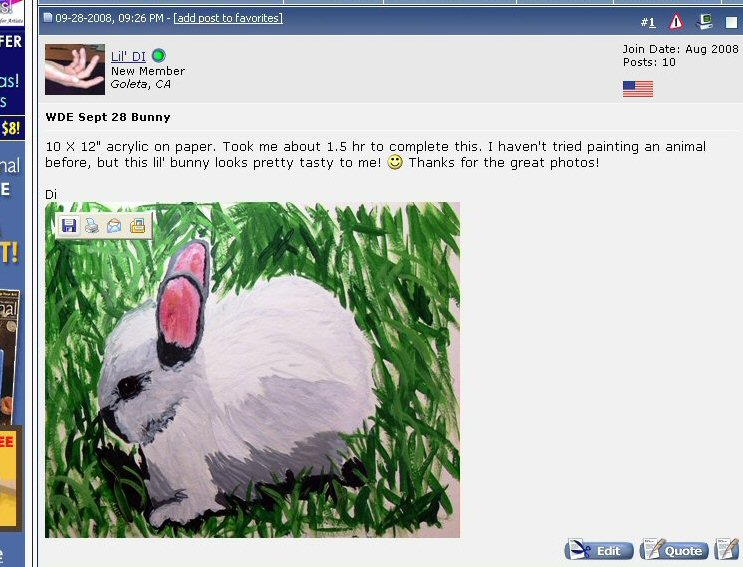
1Download the images from the forum to your own computer by holding the cursor over the image and either select the little floppy disk icon or right click on the image and select ‘Save Image As…’ on the drop down menu.
2
I keep all images for each project in a separate folder e.g. PPP Oct ’10 – otherwise I’d lose them
The following instructions are the way I do the galleries using Paint Shop Pro.
I open all the images and resize them to a resolution of 100dpi and the largest dimension @ 200 pixels. It’s easier, I think, if each image is approx. similar in size.
Add borders or frames if you wish – it’s not compulsory!! – then SAVE each file!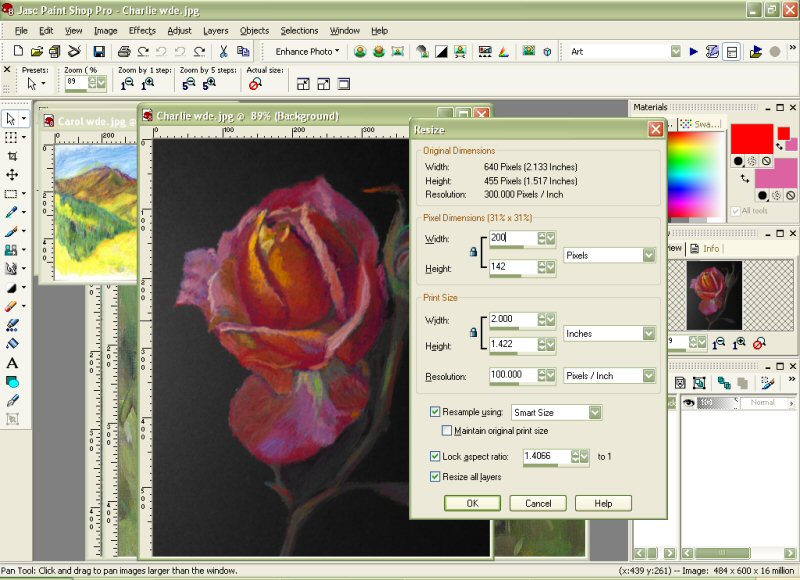
3
Then open a ‘New Image’ and make the dimensions for that 800p on both sides. This is the large size WC! now allows and gives you room to arrange the images.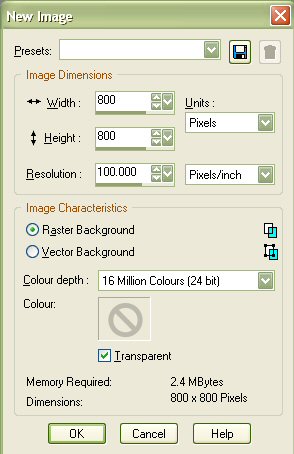
4
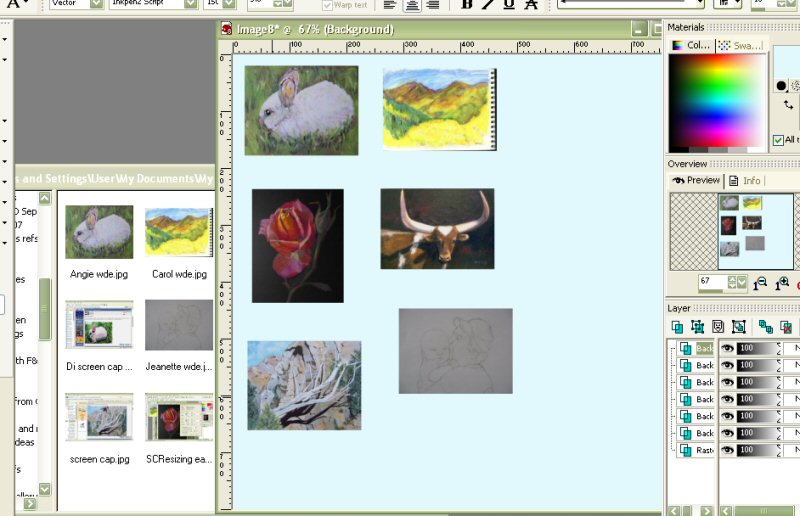
Now open your Browser with your New Image window open –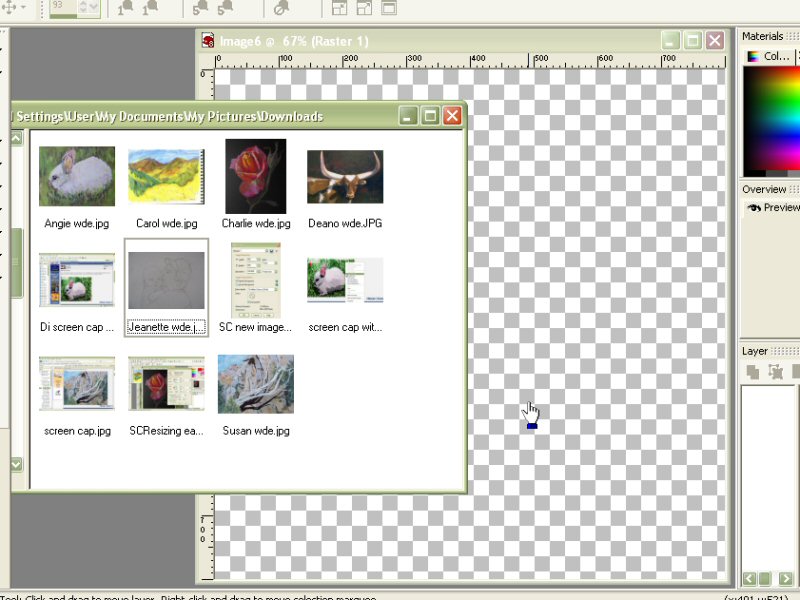
5
First, select a colour for the background if you wish.From here, with PSP it’s a simple matter of sliding the images across to the blank new image and arranging them.
If you don’t have a browser facility, simply copy and paste each image into the gallery image box.
6
Then add the names, crop to a suitable size and add borders or any other ‘decoration’ you wish!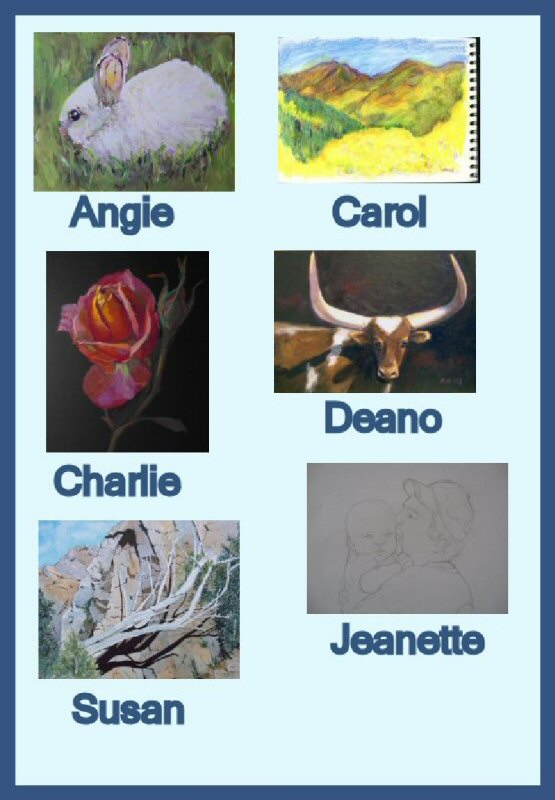
7
Instead of adding borders, I now keep all backgrounds the same colour and width, although the height may vary.When I upload each gallery image page (there can be four or five depending on entries that month) I make sure each url, surrounded by the image tags –
and first separated by a return, so they go onto a new line but no spaces so that when submitted they appear to be one continuous image.
Your post should look something like this ….
Cheers, Maureen

Forum projects: Plant Parade projects in the Florals/Botanicals forum , WDE in the All Media Art Events , Different Strokes in Acrylics forum . -
AuthorPosts
- You must be logged in to reply to this topic.
Register For This Site
A password will be e-mailed to you.
Search